
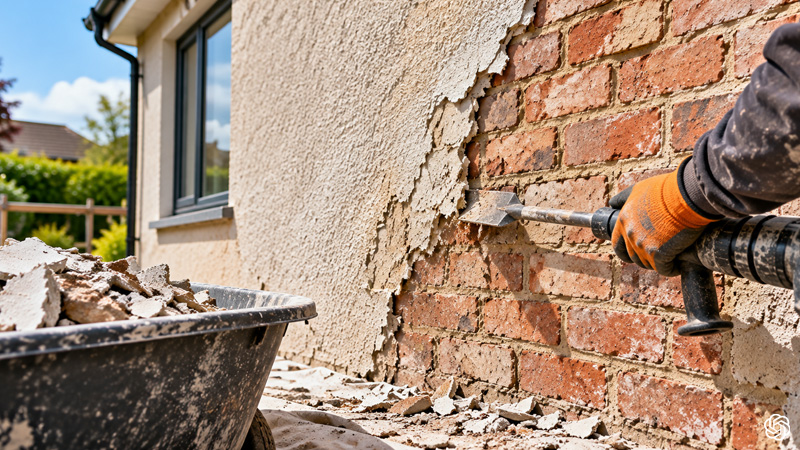
How to Prepare Your Property for Render Removal
Render can protect an external wall and give a property a particular finish, but old or damaged render can also hide problems underneath. Cracks, loose areas, damp patches and trapped moisture may not become clear until the outer coating is removed. If you are considering render removal, preparing the property properly can make the work easier and help protect the brickwork beneath.
Preparing for render removal is not simply about clearing the area around the walls. It involves understanding the condition of the render, checking for signs of damp, considering access, protecting windows and nearby surfaces, and making sure the wall can be inspected once the coating has been removed.
The condition of the building should always guide the preparation. A property with sound brickwork and easily accessible walls may need a different approach from an older house with fragile mortar, several layers of render or signs of moisture behind the coating. Good preparation gives the work a clear starting point and helps reveal what needs attention next.
What Should You Check Before Render Removal?
Start by looking closely at the existing render. Cracks, bulges, loose sections, hollow sounds and areas where the coating is separating from the wall can all provide useful information about its condition. You do not need to diagnose the cause yourself, but recording visible changes can help when discussing the work.
Pay particular attention to areas where the render meets windows, doors, roof lines, extensions and other changes in the building. These junctions can be more exposed to movement and weather. If the render has cracked around one of these areas, the underlying masonry should be checked once removal begins.
Damp is another important consideration. If you have noticed damp patches inside the property, mould, peeling internal paint or a musty smell, mention this before the external work starts. Render can sometimes trap moisture against masonry, particularly when an unsuitable coating has been applied to an older wall. Removing the render may help expose the condition of the wall, but it does not automatically solve every damp problem.
The age and construction of the property should also be considered. Older buildings may contain soft bricks and lime mortar, which behave differently from modern masonry and cement-based materials. A hard render coating can sometimes restrict the movement of moisture through an older wall.
Dynamic Restoration explains that render removal can be necessary where render or pebbledash has cracked and allowed moisture to become trapped between the coating and brickwork. Its service also includes an intensive clean after removal to deal with remaining cement and concealed soiling.
It is useful to know what is likely to be underneath the render, but do not assume the brickwork will be perfect. Render can hide cracked bricks, damaged mortar, previous repairs, staining and other defects. One reason for removing an old coating is to see the actual condition of the wall.
You should also consider what you want to happen after the render is removed. Some homeowners want to expose original brickwork, while others may plan further cleaning or repair. If repointing is required, it is easier to plan this once the wall has been exposed and assessed.
How Should You Prepare the Property and Work Area?
Access is one of the first practical issues to consider. The team needs enough space to reach the wall safely and work without unnecessary obstacles. Move garden furniture, bins, plant pots and other loose items away from the work area where possible.
Do not remove anything that is fixed to the property without first discussing it. External lights, signs, cables, drainpipes, satellite equipment and other fittings may need to remain in place or be temporarily adjusted by a suitable professional.
Windows and doors also need protection. Render removal can produce dust, small pieces of material and other debris. Nearby surfaces should be protected before work starts, especially where the wall is close to a path, driveway, garden or neighbouring property.
Dynamic Restoration states that site preparation includes protecting windows, doors, pathways and nearby areas. Its wider project information also refers to protective sheeting being used to help keep work areas clean and organised.
Access equipment may be needed depending on the height and layout of the property. Scaffolding or other suitable access arrangements can make it possible to reach upper walls safely and work with better control. Access should be considered before removal begins rather than treated as an afterthought.
Think about entrances and everyday movement around the property too. If the main entrance is close to the wall being treated, discuss how people will safely enter and leave during the work. Pets and children should also be kept away from active work areas.
The condition of nearby paving and landscaping should be considered. Plants close to the wall may need temporary protection, while fragile surfaces may need additional covering. This is particularly important when old render is being removed from a large elevation.
It can also help to take photographs before work starts. Photos provide a useful record of the property before the render is removed and can make it easier to compare the exposed brickwork afterwards. They may also show areas that were previously hidden or difficult to inspect.
If you have concerns about a particular crack, damp patch or section of loose render, point it out before work starts. Small details that appear unimportant from ground level may be useful when assessing the wall as a whole.
What Happens When the Render Is Removed?
Render removal should be approached as a controlled process rather than a race to expose the brickwork. The method used can depend on the type and condition of the render, the age of the building and the material underneath.
The main aim is to remove the coating while reducing unnecessary damage to bricks and mortar. This is particularly important on older properties where the masonry may be more sensitive.
Dynamic Restoration describes assessing the render and brickwork before selecting a removal method. Its published service information also describes careful removal followed by cleaning to remove cement remnants and concealed soiling.
Once the render is removed, the wall may look very different from what you expected. Variations in brick colour, old repairs, mortar joints and weathering can become visible. This is normal, particularly where the wall has been covered for many years.
The exposed brickwork should then be inspected. Cracked or damaged bricks may need repair or replacement. Deteriorated mortar may require repointing. Staining or leftover render may call for additional cleaning. The next stage should be based on what is actually found rather than assumptions made before removal.
Moisture is also worth monitoring. If the wall has been covered for a long time, trapped moisture may take time to leave the masonry. A wall does not necessarily become completely dry as soon as the render has been removed. The building may need time to return to a more natural moisture balance.
This is particularly relevant to older properties. Traditional brickwork and lime mortar can be designed to absorb and release moisture gradually. Replacing a failed coating with another unsuitable material without understanding the wall can simply create another problem.
The finished appearance is another reason to prepare properly. If the purpose of render removal is to reveal original brickwork, cleaning and repointing may be needed before the wall reaches the appearance you have in mind. Removal is often the first stage of a wider restoration process rather than the final step.
Dynamic Restoration’s project information shows render removal being combined with intensive cleaning, raking out and repointing on different properties.
The most useful preparation is therefore to keep expectations realistic. You may discover beautiful original brickwork beneath the render, but you may also find areas that need repair. Knowing this before work starts makes it easier to plan the next stage.
Frequently Asked Questions
Do I need to do anything before render removal starts?
Yes. Clear loose items from around the work area, make sure access is available and discuss any external fittings or concerns with the contractor. Windows, doors, pathways and nearby surfaces should also be considered for protection.
Can render removal cause damage to brickwork?
It can if unsuitable methods are used or the work is carried out without considering the underlying masonry. Older or softer bricks may need particular care. The render and brickwork should be assessed before the removal method is selected.
Should I repair damp before removing render?
The cause of the damp should be investigated rather than simply repaired from the inside. If the render is trapping moisture, removing it may form part of the solution. However, damp can have several causes, so the whole wall and surrounding areas should be considered.
What happens to the brickwork after render removal?
The exposed wall can be inspected for cracked bricks, damaged mortar, stains, old repairs and remaining render. Depending on its condition, further brick cleaning, brick repair or repointing may be required.
Do windows need protection during render removal?
Yes. Windows, doors and other nearby surfaces can be exposed to dust and falling material during the work. Appropriate protection should be installed before removal begins.